Introduction
The dashboard is a hub that offers a variety of tools to enhance your overall experience using Beep.
This guide explains how to use each of the dashboard’s 5 tabs: Beeps, Team, Tutorials, Plan, & Integrations

To learn how to access the dashboard, click here.
Table of Contents
1. Beeps
This is the tab that is displayed when opening the dashboard. You can access different types of beeps linked to your account, and view them in different ways to suit your task management needs.
Beep Types
On the left, you can choose what beeps you want displayed:
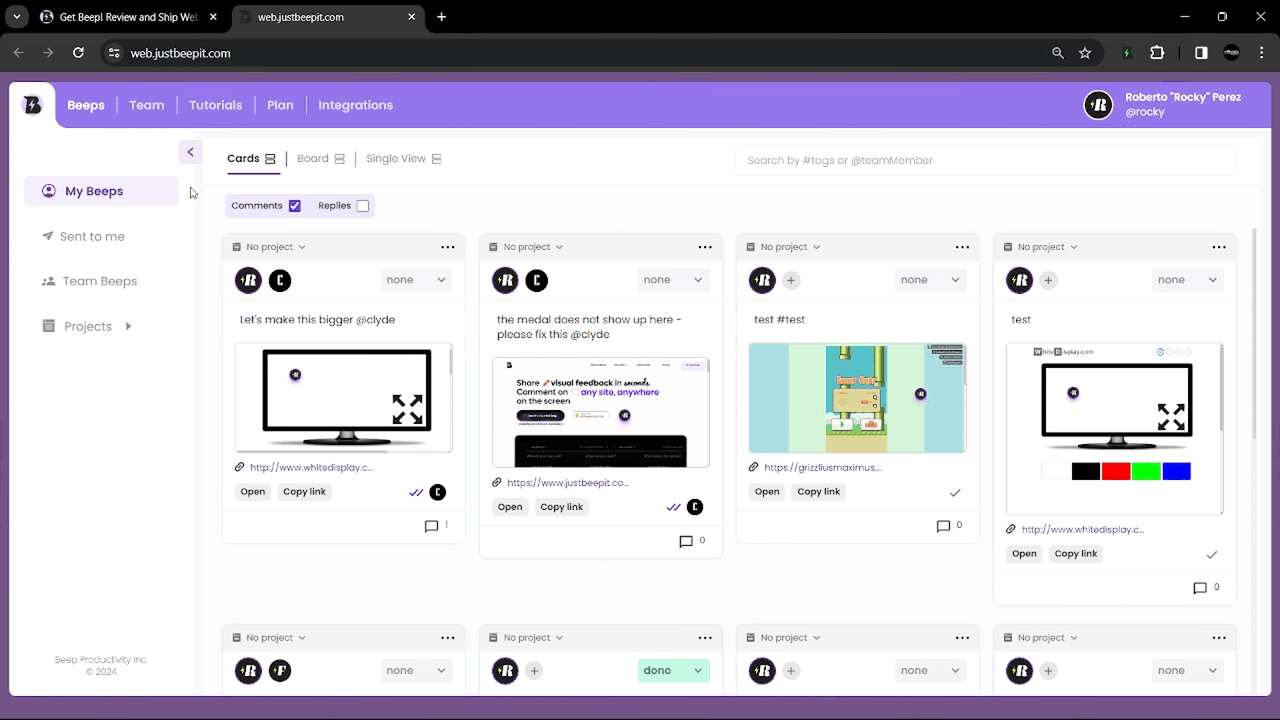
- My Beeps - only view the beeps you created (this selection will be displayed by default)
- Sent to me - only view the beeps you received from others
- Team Beeps - only view the beeps shared within your team
- Projects - only view beeps assigned to specific projects
View Modes
On the top of the white space, 3 view modes are available for you to choose how you want your beeps to be displayed:
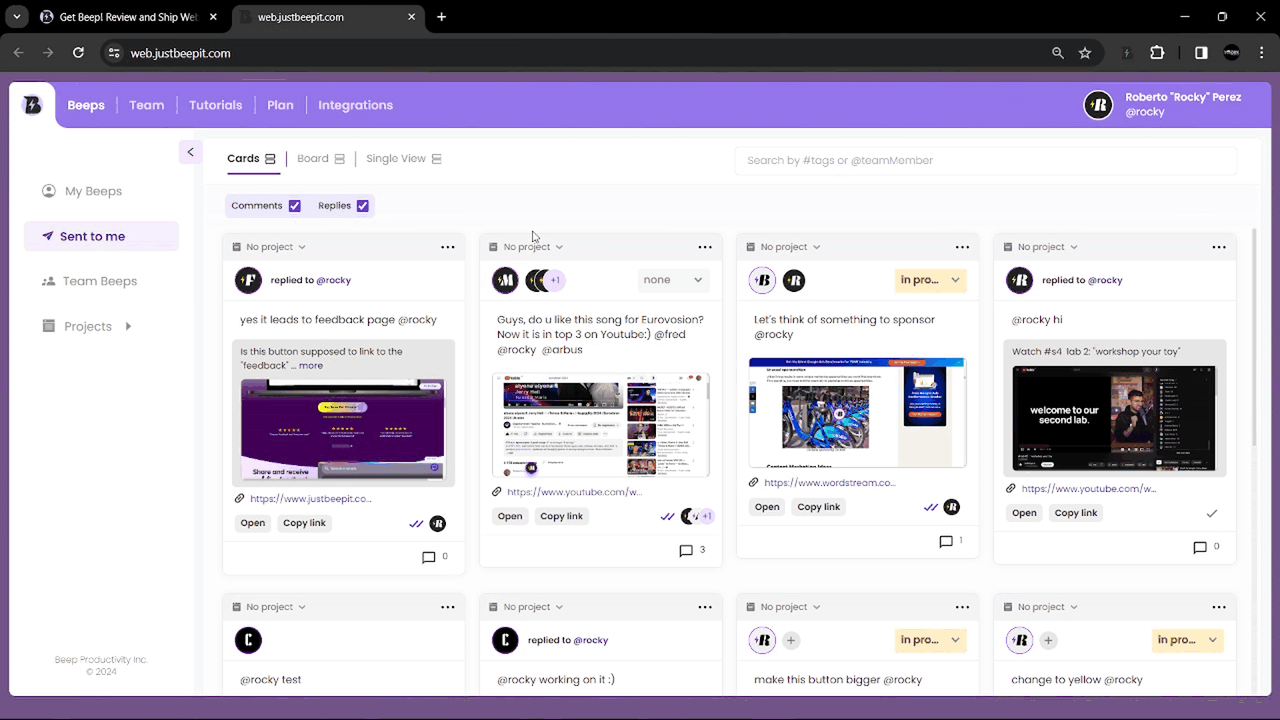
- Cards - display beeps in a grid (this selection will be displayed by default)
- Board - display beeps on a kanban board
- The best view mode to manage and track tasks according to their completion status (i.e., to do, in progress, done)
- Click and drag beeps to other columns to change their status
- You can also view project-level kanban boards. This way, only the tasks assigned to specific projects are displayed and can be managed for better organisation. To do this, click on the “Projects” tab on the left panel of the dashboard, click on the project you wish to view, and then click on the “Board” icon at the top panel to switch to kanban board view.
- Single View - beeps are maximized to display a list of larger screenshots on the left with their corresponding comments on the right panel.
- On the left screenshot side, hovering over the beep avatars will reveal the comment
2. Team
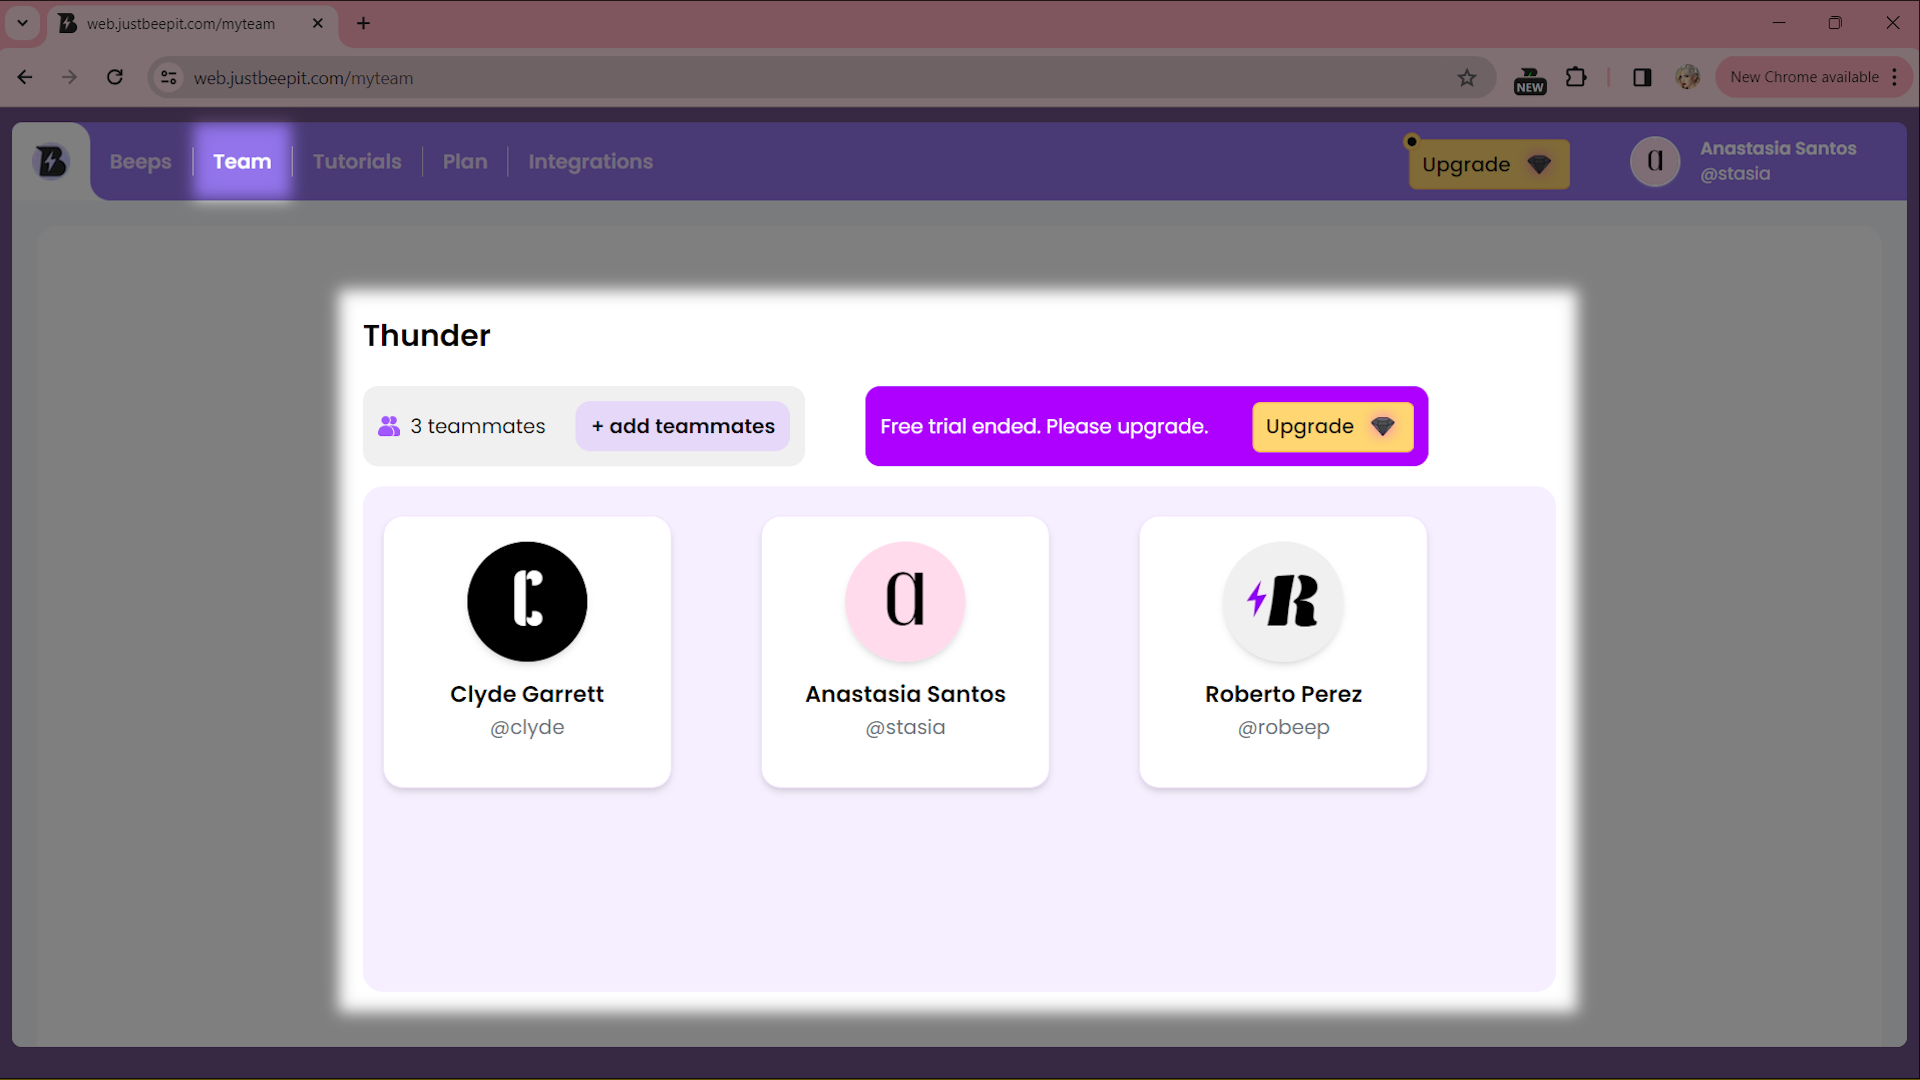
This tab displays your team. You can see the total number of members in your team, as well as their full details.
Additionally, in the “Team” tab, you can:
- create a team
- add team members
- remove team members (only for team admins)
Only those who created a team (team admin) can manage their team (i.e., removing team members). To find out more about team management, click here.
3. Tutorials

This tab displays a list of tutorial videos showing how to use Beep & various use cases to get inspired.
To view a video, simply click on that specific video’s play button.
4. Integrations
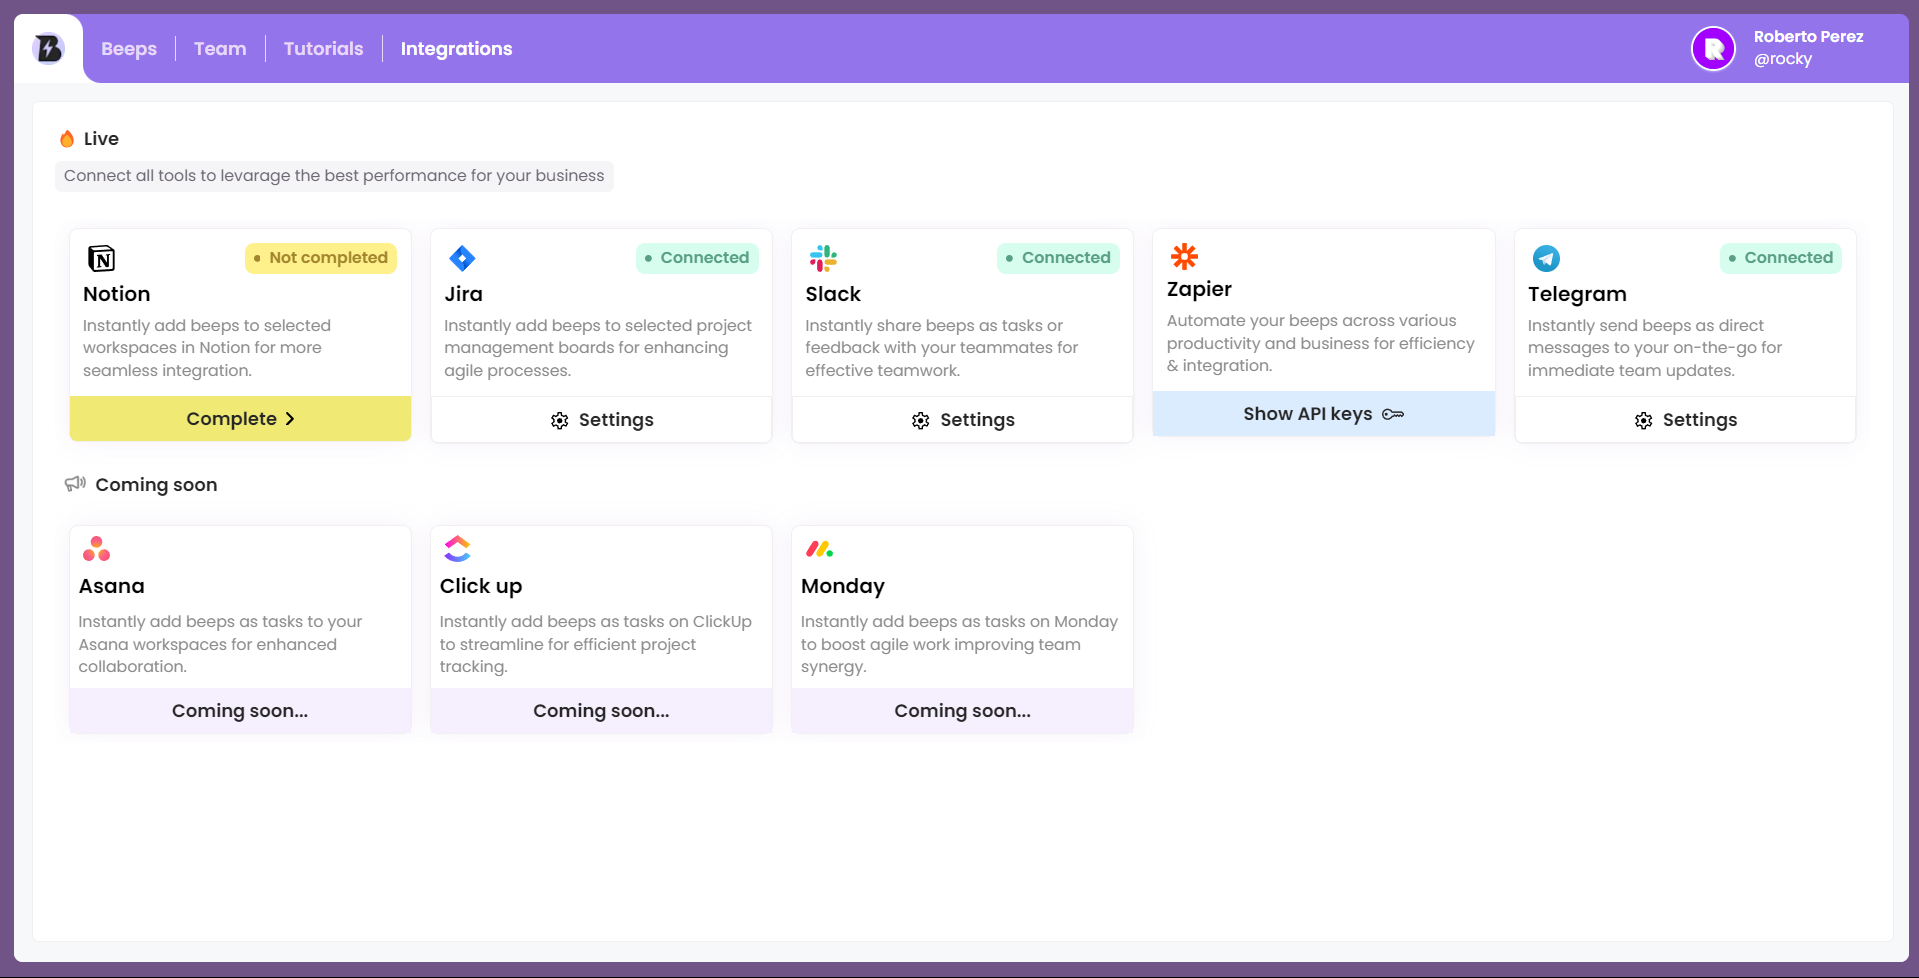
This tab displays tools that you can integrate Beep with.
You can find out about the current integration options and how to connect with each tool here.
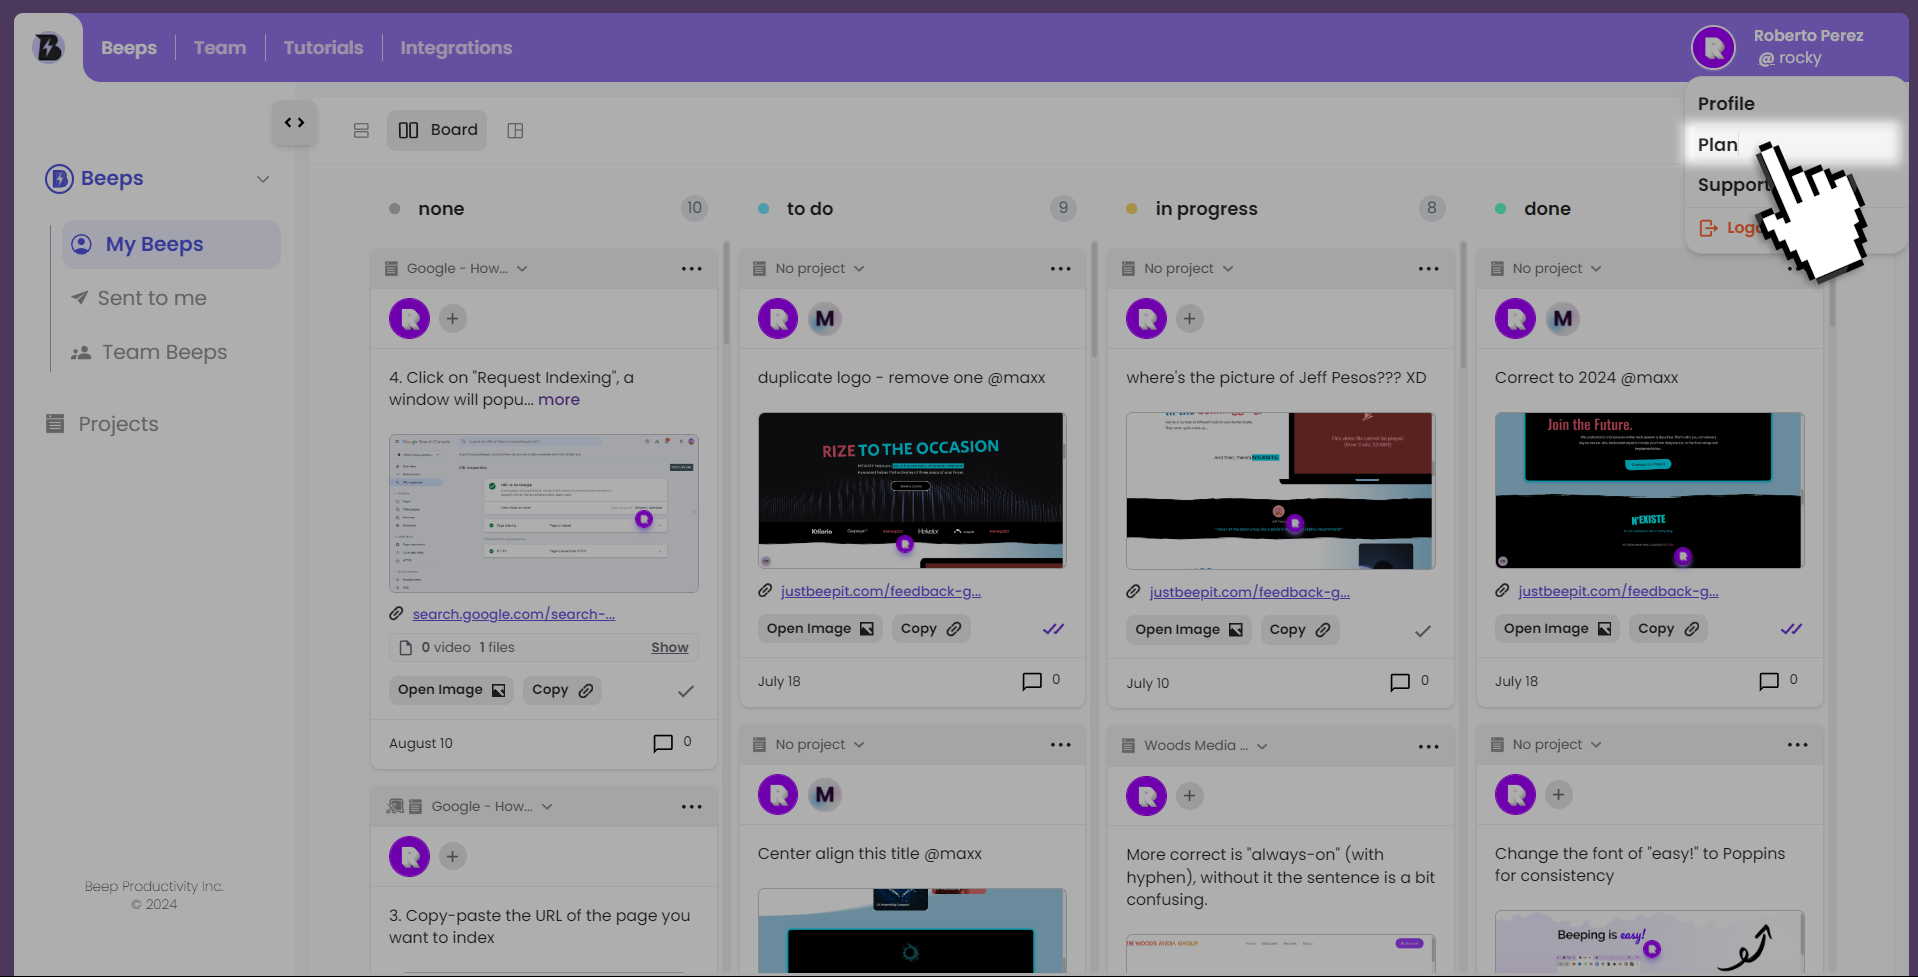
5. Plan
This page displays the plan you are currently subscribed to on Beep. To access, click on your profile info on the upper-right corner of the dashboard, and then click on “Plan” from the drop-down menu.
At the moment, there are only 2 tiers: “Free Forever” & “SuperBeeper”.
How to upgrade to SuperBeeper
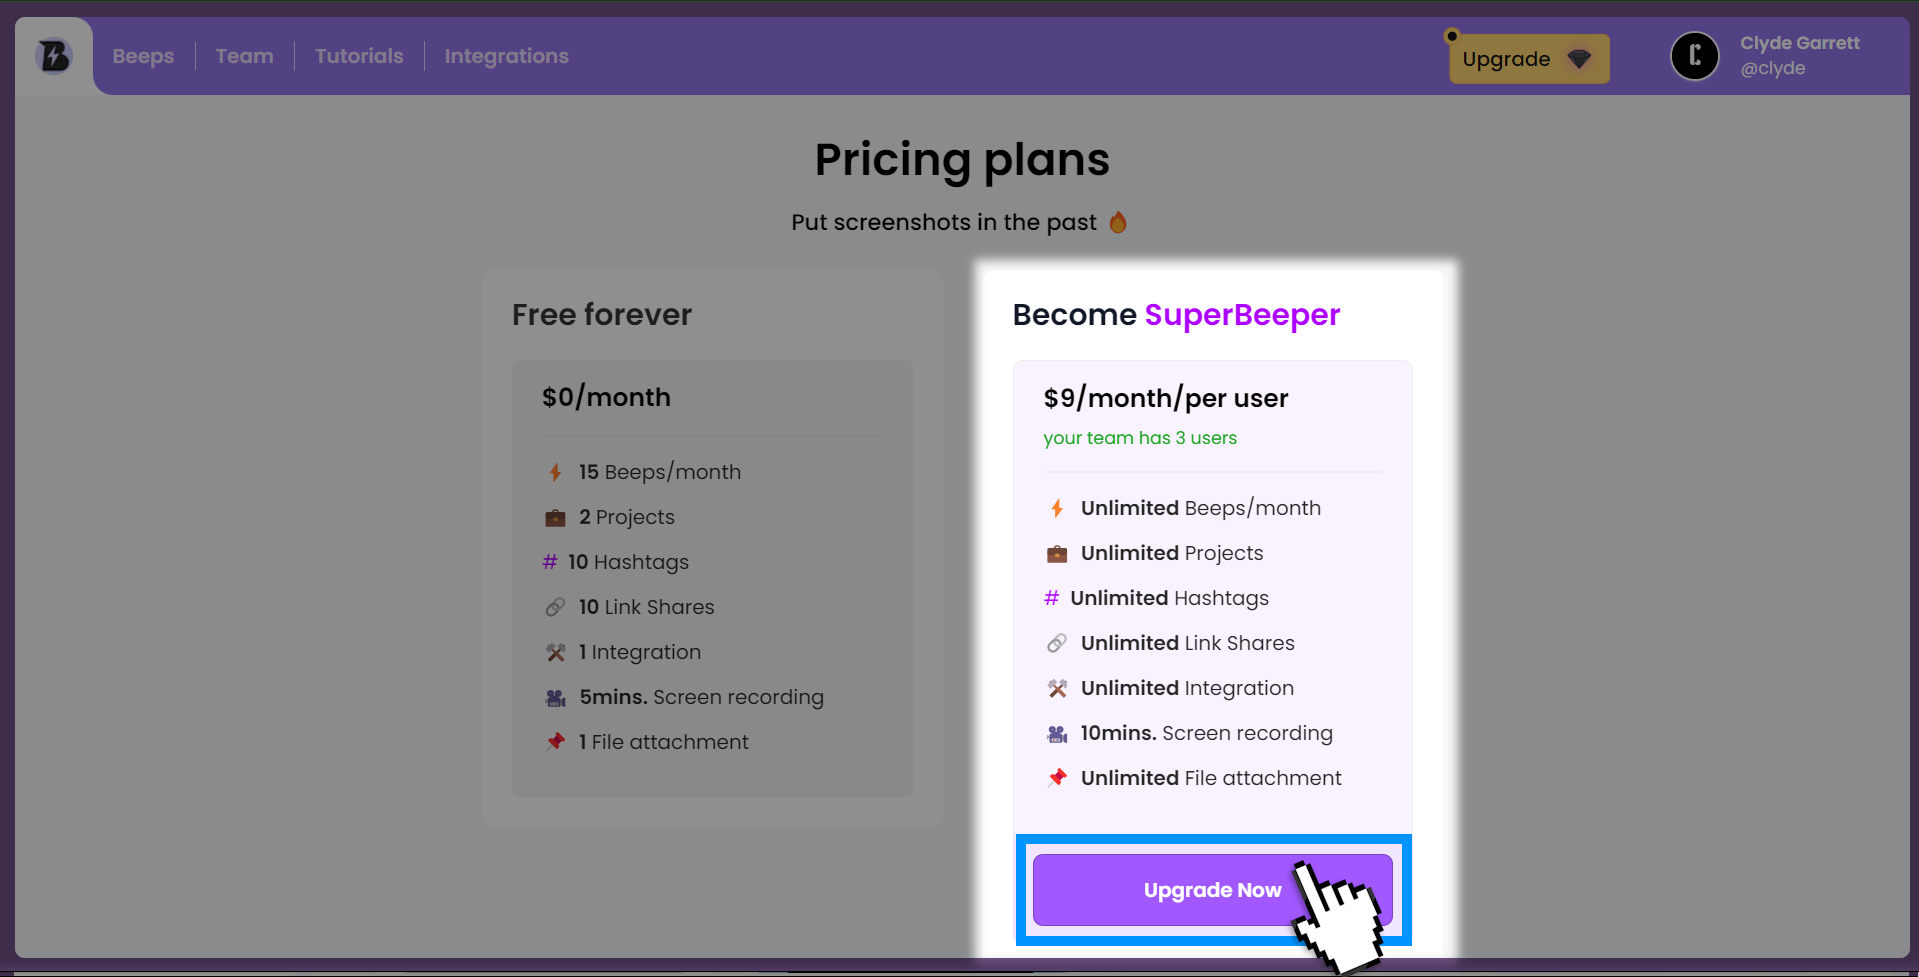
If you are a free user and want to upgrade your plan:
- Click on the “Upgrade Now” button at the bottom of the SuperBeeper option.
- On the Stripe payment page, fill out the required details.
- Click the “Pay & Subscribe” button
To learn more about upgrading your plan, click here.
6. Support
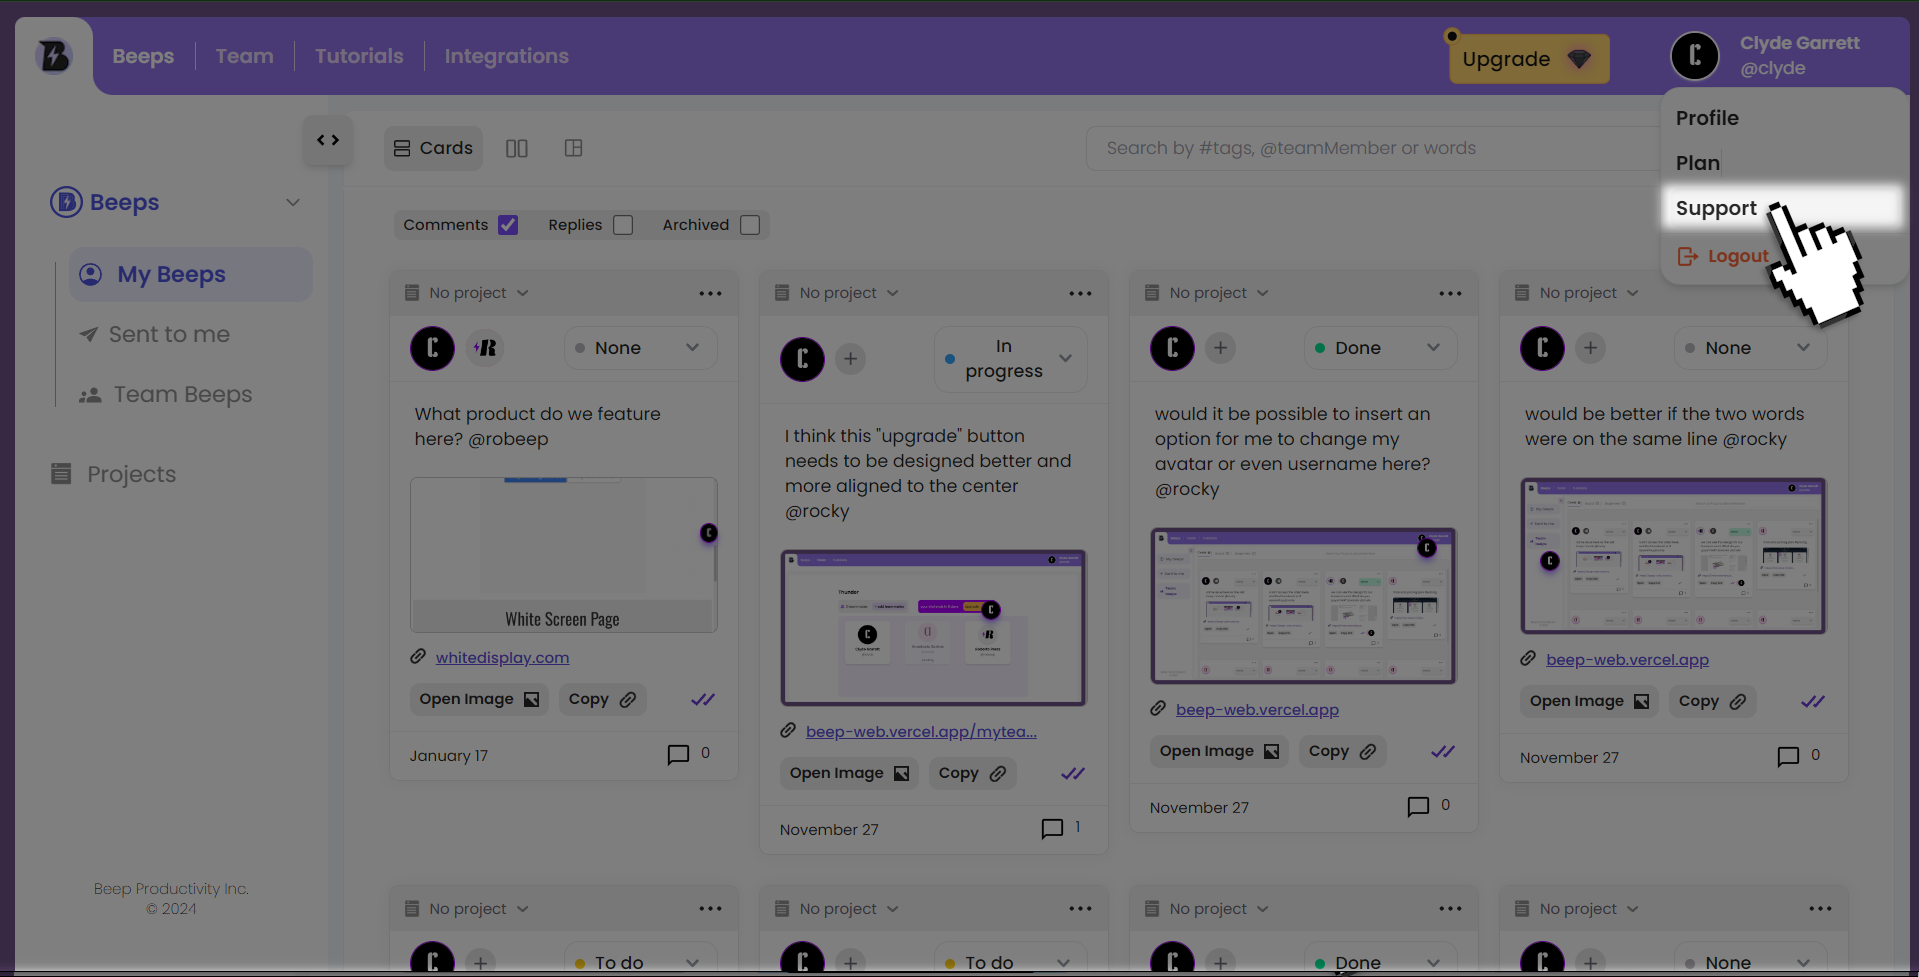
Clicking “Support” (shown above) will direct you to the main directory of our Help Center (shown below).